4x5 Large Format Easy Step by Step Guide

An introduction to 4×5 large format photography Pt: 3 by Benn Murhaaya
Finally we have got part 3 of this epic series on shooting Large format. You can see the other parts here. Yet again, this is huge and there are some images in the article that might not be safe for work.
An introduction to 4×5 large format photography Part: 3 – Camera Movements for portrait photography
In the previous part, we've talked about using large format field camera, or view camera as it is also called, in general. In today's installment we will focus on the movements, that the camera allows and what they are good and not so good for.
Setting things straight
Before I start with the examples, I want to make one thing clear. You've all probably seen the pictures of bellows camera all bent out of shape. It's especially common in marketing materials such as – http://linhof.com/master_technika_classic.html. Most of the ridiculously looking shapes are correspondingly ridiculous and are unusable for any practical purposes. In most cases only a slight movement will do the trick.
So what movements view cameras allow and what they are good for? The answer is 'It depends'. It depends on the manufacturer or the type of the camera. The most degree of freedom i.e. movements usually have kardan type cameras or rail cameras such as Linhof Technikardan, Sinar P1, Toyo… These cameras employ one rail (circular, square, triangle…) which supports the standards (the plane that holds the lens and the plane that holds the film). The rails come in different sizes and some types allow extension rails. With this setup, you can move front or back independently of each other, put them very close together or very far apart.
These cameras are usually top of the line professional level equipment that when new cost like a house. They are also modular, allowing swapping bellows, employing additional standards for shades or for long bellows support. When using very long lenses, the sag of the bellow would block the light inside the camera. The similar problem might arise with very wide angle lenses where the bellows could not be compressed enough to allow focusing and is then therefore replace with so called wide angle bellows. This looks more like a bag than a bellow and does not provide you with such extension.
For 4×5 in cameras, wide angle bellows are good in general for lenses shorter than 90 mm. You can get away with normal bellows if you restrict your camera movements. Both standards front and back, allows for shifts (that is lateral shift, shifting to the sides). Rise (shift up), fall (shift down; all shifts keep the planes of lens and film parallel). They also allow tilt in two axes (tilt in vertical axis and tilt in horizontal axis also called swing). These movements can be combined. For example extreme shift would be accomplished by tilting the whole rail with the camera and then tilting the film and lens standards back the same amount.
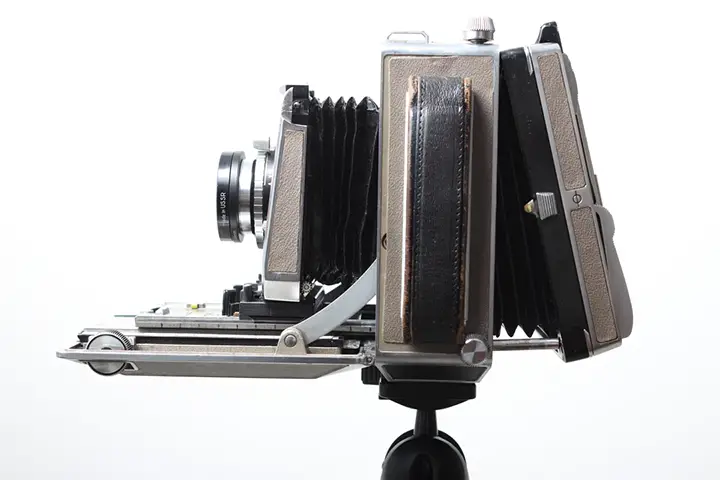
Second most flexible cameras are so called technical cameras (a special subsection of field cameras), such as Linhof Technika or MPP. These allow some limited flexibility of the film standard. Front allows for larger moves but it is not as flexible as rail cameras. However, for 99 out of 100 everyday situations, these are the best of both worlds. Enlarging the moves can be again accomplished by tilting the camera as a whole and then tilting the front and back in the opposite direction the same amount.
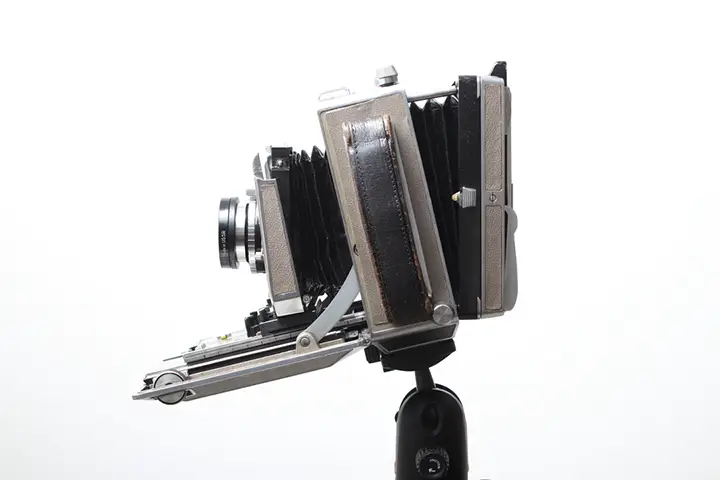
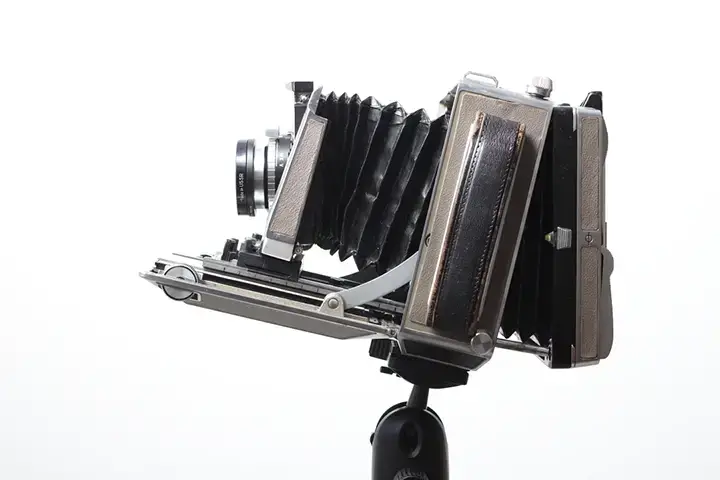
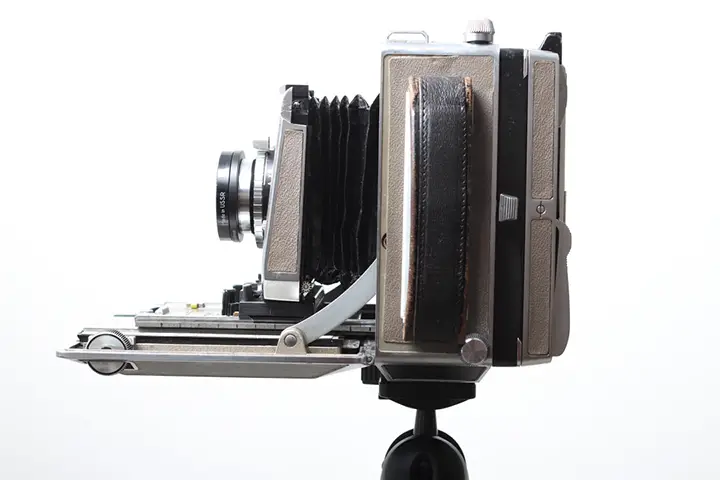
Linhof Technika – tilted to expand fall and rise movements.
Rest of the view cameras usually doesn't allow any back movement. Again, this does not have to be so limiting. Instead of tilting the back, we can tilt the front and then rotate the camera so the lens is in the same position. For the most parts the front standard is where the most fun is.
Last thing to mention is, as the chapter mentions – settings things straight. It's very handy, and crucial for any serious work, that your camera has some locking zero positions where everything is on the optical axis, nothing is tilted, nothing is shifted and everything tightly secured in place. As mentioned in previous parts a small misalignment might result in rather visible result in final picture (i.e. head of the model is in focus, her feet not, but the ground behind her is tack sharp). If you don't have such click-in zero positions (my Linhof Technika is missing the front standard tilt stop) you will have to use bubble level to rebalance every time you've tilted it.
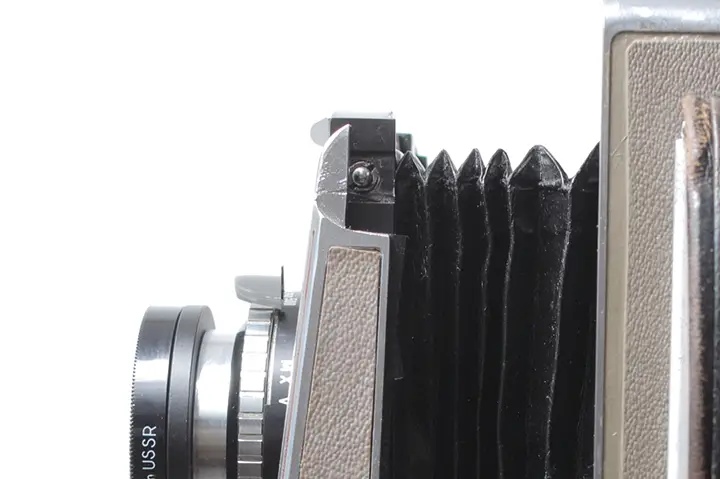
Missing stop on my Technika
Studio Examples
To preface the photos, all these examples were taken with the same lens, which is Schneider Symmar 135/5.6 at 5.6. When these photos were taken, my friend who posed for me was just about two weeks from giving birth to her child, so these photos might not be your average glamour shots. The light was a flash through white umbrella coming from slight top left. There are some variations is exposure due to the camera movements.
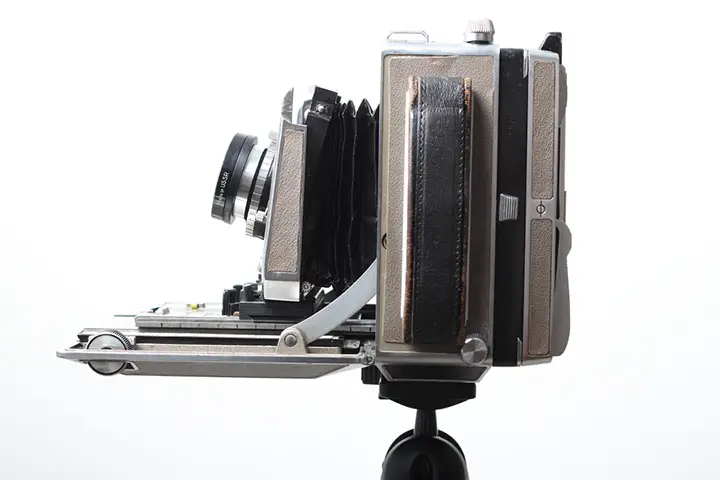
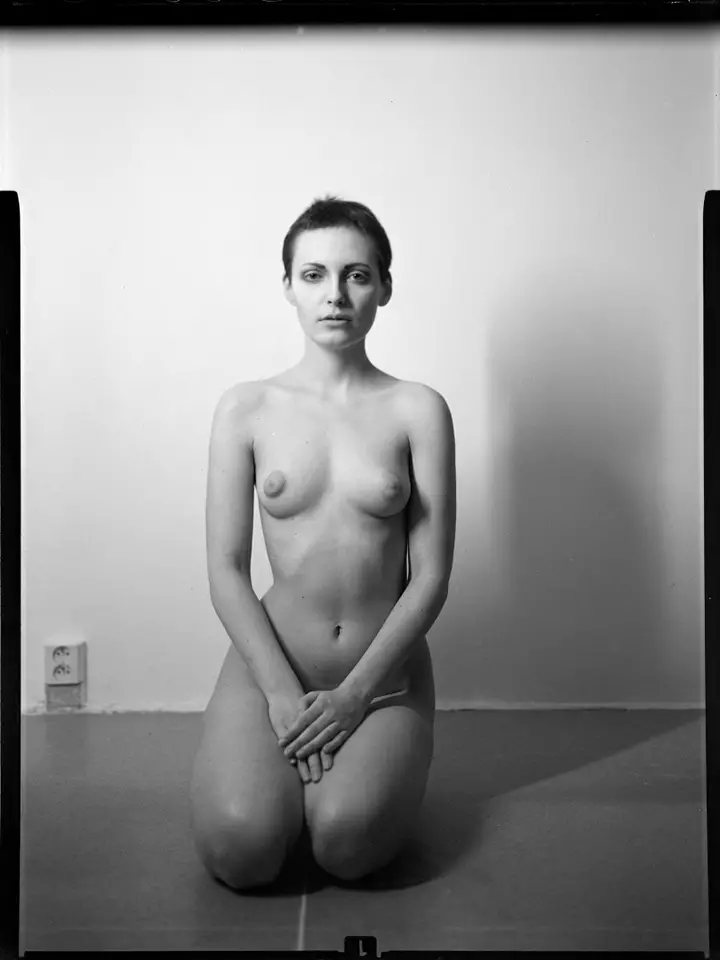
a) Basic setting
The most basic setting is with front and back being aligned on optical axis. Just like your everyday camera. No tilting or shifting. This is probably the most common setting. The large format camera gives you very shallow depth of field as it is.
Basic setup
This picture is taken straight on with the camera leveled. The bookshelf at the back is deliberate choice to show the dept of field. Notice that the lines in the bookshelf are pretty much vertical as well. This setting gives a natural look.

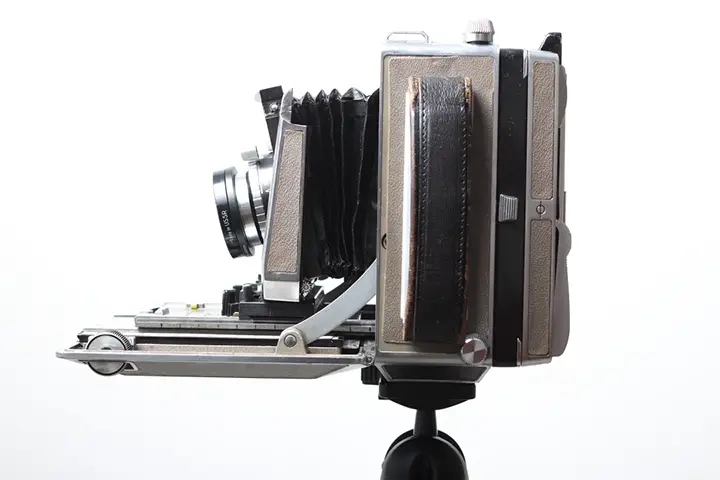
b) Front tilted to the back
What I mean by front tilted to the back? It's just like tilting your head to the back, as your face points up, the lens points up. Here is a picture of the camera while taking this picture:
Lens tilted back

Now the bookshelf comes in handy. On it we can see, that the top if more out of focus than the bottom. Tilting the lens to the back tilts the plane of focus to the back. Idea behind this, you can limit the focus to only certain part of the image (usually the eyes) and to make it look that the depth of field is even smaller. Also the bokeh might get distorted in a nice way.
But with the plane of focus tilted this way, we might run into problems. For example, when tilted back, her shoulders are also in focus. They were not in the previous example. Another point of focus is distracting. From technical point of view, you loose a bit of light. When you are tilting extremely, you are projecting the outer parts of the image circle, where the lens is usually not that sharp. When taking whole body shots, you will have an area of focus on the ground where the focus plane meets the ground.
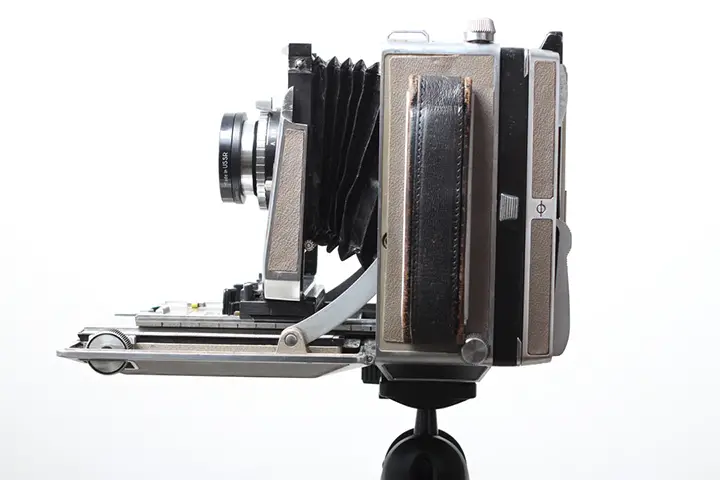
c) Front tilted to the front
This is exactly the opposite case to the previous one but visually it might be more different than you think.
Lens tilted to the front

First to the background, top shelves are being in focus while bottom ones are out. Except the hair and eyes, there is no other place that is in focus in her face. If one would be taking pictures of the whole person, if taken properly, there would be no place on the ground in the shot that would be in focus. But watch out for top of the threes lurking in the back. This setting is probably the go to setting for dreamy portraits. The face is not distorted and when placed in proper settings, everything except the eye line will be out of focus.
d) Front rise
Now instead of tilting the front lens, we keep it plan-parallel to the back but shift it upwards. This is usually done with architecture photos where you are bound to have the film plane perpendicular to the ground (and parallel to the building you are photographing) and you want to fit a tall building on the film. Without the lens not shifted, your vanishing point (and also the horizon) will be pretty much in the middle of the frame. Shifting the lens can be though of, for better, understanding as keeping the lens steady and moving the film in the position where the whole building is projected by the large image circle of the lens.
Front rise

Wow, that's not good… To fit her in the frame, I had to lower the camera obviously. So we are taking picture from below which is usually not very pleasing. The lens shift creates distortion. 135 mm lens on a 4×5 is about equivalent to 35 mm on 135 film but the lens is actually capable of projecting 190 mm circle which is tad short of covering 13×18 where it would be a rather wide angle. By shifting it, it's like taking portion of side area of that 13×18 picture (remember how people on the sides tend to be distorted when shooting group pictures with wide angle).
I am not including the bottom shift, as it is rather hard to do with the Technika and the results would be similarly unpleasant. Also, remember that you are again using outer portions of image circle where the resolution is usually declining and you are also battling a light falloff. Another thing to keep in mind is that the projected circle is given for f/22 (f/22 for large format lenses is like f/8 for 135 lenses. Just about the sweet spot). This is usually no problem for architecture as stopping down the lens to f/22 improves the sharpness and light falloff. On a lens wide open the outer area will be optical inferior to the center.
e) Back tilted back
Some of the large format cameras allow even a back to be tilted in various ways. Can it be used for portraits? Let's have a look.
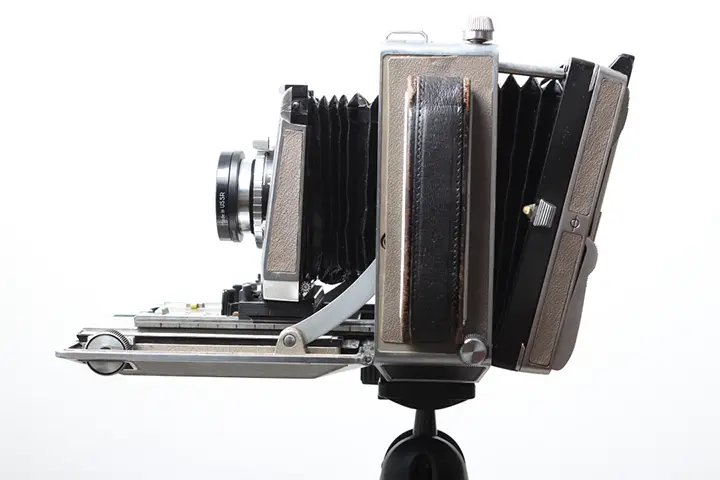
Back tilted back

Top of the frame is not showing the border from the loading part of the film holder as its thickness is blocking the light. The vertical lines are converging slightly to the top. Her neckline is larger when compared to the normal photo making he body look larger than it actually is. The depth of field is again affected in a different way. If I am not mistaken, as long as the lens is perpendicular to the ground, there should be no other point (or a line for that matter) in focus anywhere as the film plane is crossing the projected plane in one line.
f) Back tilted to the front
This is again similar with some reversed effects.
Back tilted front

In this picture, we can clearly see the verticals converging down. Top of her head is being given kind of Dr. Frankenstein treatment. The frame on the top is showing. Depth of field is affected similarly as in previous example.
3) What has been left out?
I did not cover every possible move or their combination. That would be exhausting in exchange for not much of new knowledge. I've excluded tilts to the side of either the lens and or the back. Front swings (tilts to the side) affect the depth of field the same way but in different plane making a one vertical line (in reality it's plane that is not parallel to the film plane) in focus when taken to the extreme.
In less extreme way, it can be very useful to get both eyes in focus when your model is not facing directly the camera. This can get handy even if you don't want any artistic blurring by tilting the lens front or back. The side swing can be miniscule to achieve it. In praxis, the best thing is to go by is trial and error, adjusting the side tilt bit by bit and focusing again and again until you have both eyes in focus.
4) Dos and don'ts?
My rule of thumb for taking pretty pictures would be "only use the front tilt". But don't take it as a rule and try it on your own. Other movements might be employed in different and interesting ways as well. I've seen some creepy but very eye catching photos where the shift and back tilt were taken to extremes exaggerating the perspective and making the person distorted.
Also some amount of shift in environmental portrait, especially with wide angle can be interesting. The person photographed won't get much distorted if at all when he is kept near the bottom of the frame and the towering architecture can create some stunning backdrop.
5) Real life examples
This picture is actually taken with the lens shifted down. I could not be bothered to lower my tripod so I tried to shift the lens down with the drop of the bed of the camera to fit her in the frame. Her legs gained few kilos in an instant. Also notice the top part of the frame is blurred as well as the light is masked by the thickness of the frame holder. Well that did not work out as planned.
Here is an example alignment gone wrong. The top of the building is not in focus due to the tilted lens and the whole thing is blowing up because the camera was not perfectly leveled. Shame on me.

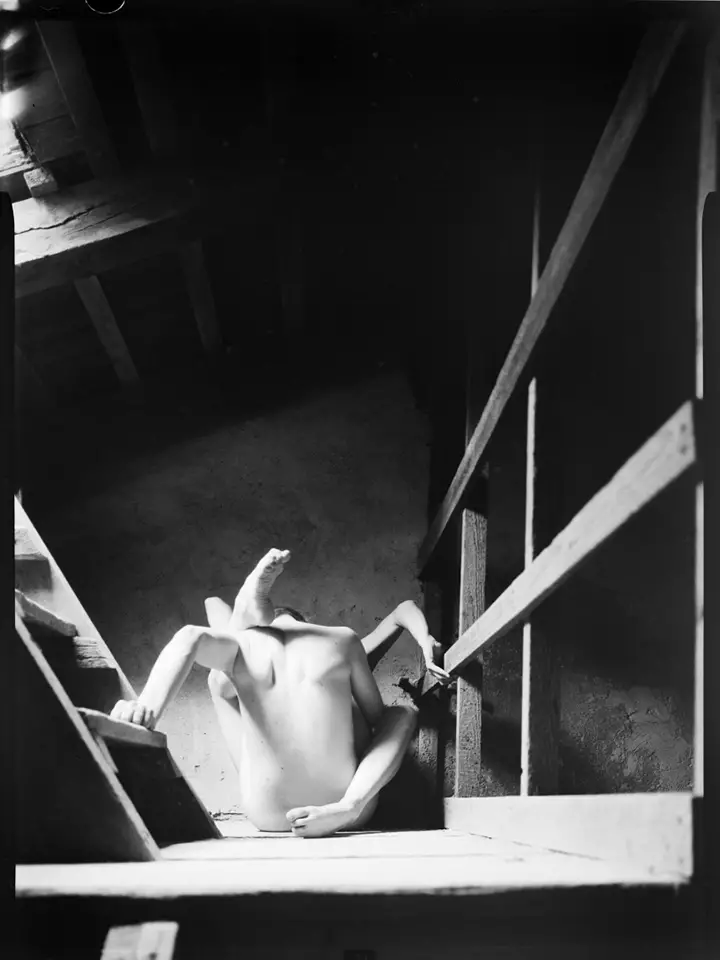
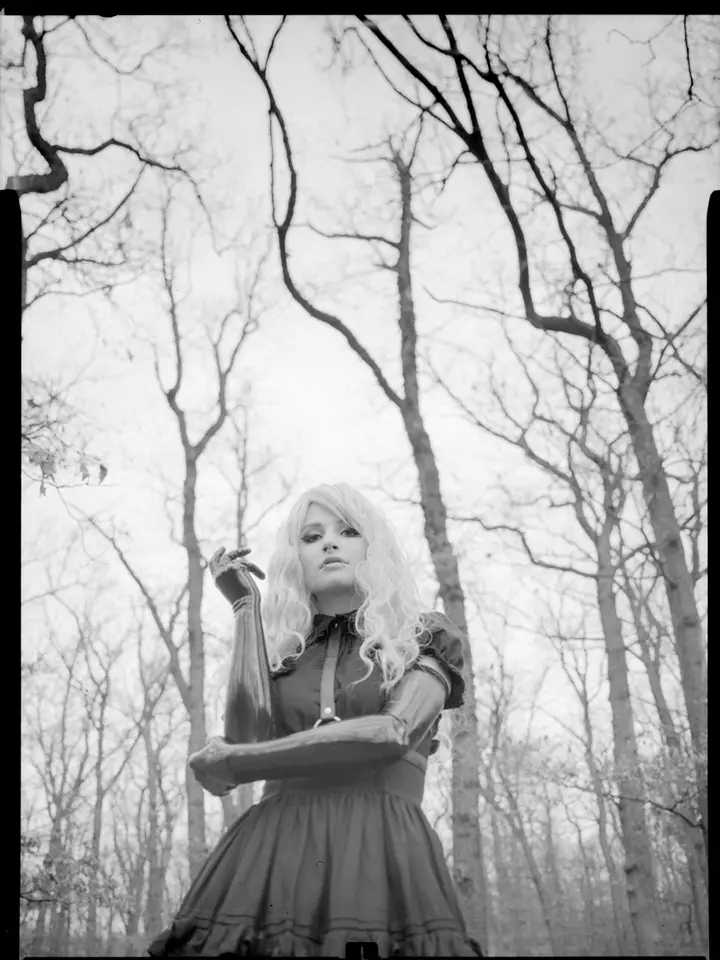
A real life example of the lens tilted to the front. Place where the trees would cross the plane of focus is outside the frame.
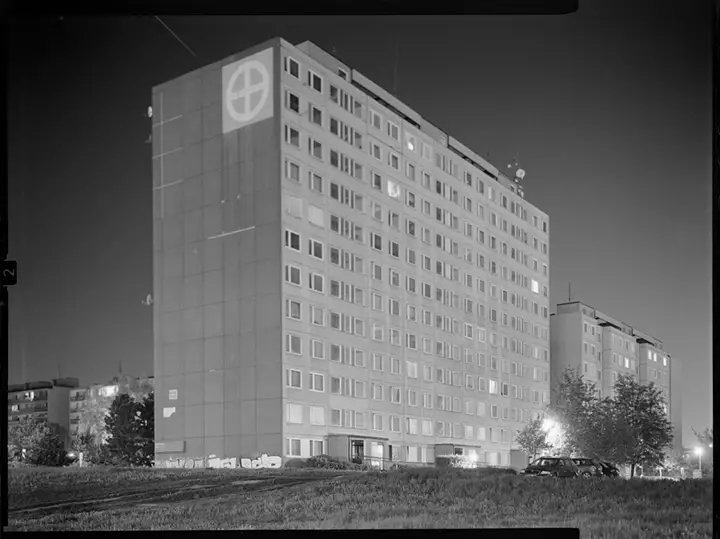
Taken with a Super Angulon 90 mm lens (that is about 28 mm equiv.) and shifted so the bottom part is leveled so it exaggerates the vanishing point at the bottom, where the bodies are. This photo was taken in a series for a poster and the top should have bare the title.

Once again this one is taken with the Super Angulon 90 with a bit of shift as well, to show the building in the back. The camera was not perfectly leveled so the top of the building is slightly bulging outwards but the girl appears normal and undistorted as she is close to the bottom.

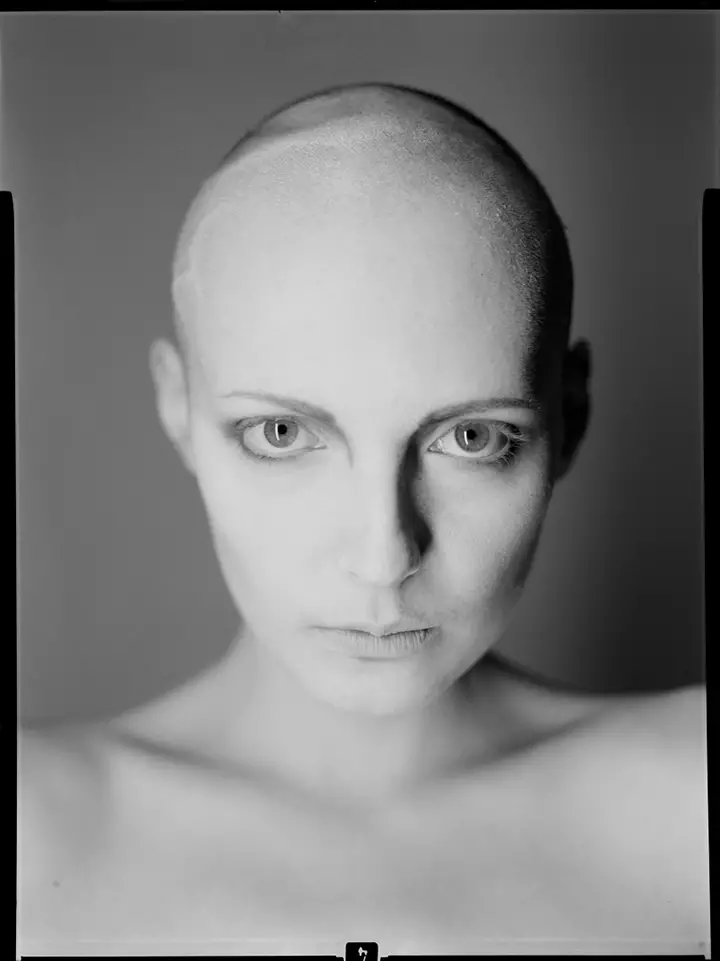
Here is another real life example of the tilt. The background poses no problem and the model's eyes just pop out of the frame.
6) Conclusion
I hope that these few examples gave you some, however small, insight into the usage of movements that view cameras offer. From my experience, front rise, front tilt and front swing is enough for majority of real life shooting situations. It's not a coincidence that these are the moves that almost all view cameras offer. If you plan on buying a large format camera, I would not worry about the rest of them.
For those, who want to get some further information, I would suggest reading this book – Focusing the view camera by H.M.Merklinger
https://www.cs.cmu.edu/~ILIM/courses/vision-sensors/readings/FVC16.pdf
But be warned, the book is very thorough and contains lots of math and equations.
Thanks to Benn Murhaaya for this informative and detailed guide. You can check out his work at his site http://murhaaya.com/ and his images below.
As usual comments are most welcome.
You can also see part one here https://www.japancamerahunter.com/2014/04/introduction-4×5-large-format-photography/ and part 2 here https://www.japancamerahunter.com/2014/04/introduction-4×5-large-format-photography-pt-2/


Source: https://www.japancamerahunter.com/2015/02/an-introduction-to-4x5-large-format-photography-part-3/